- First navigate to the Settings cog icon in the top right of the admin panel.
- On the right handside under Range Settings click Bay Options and you will see the below bay option editor.
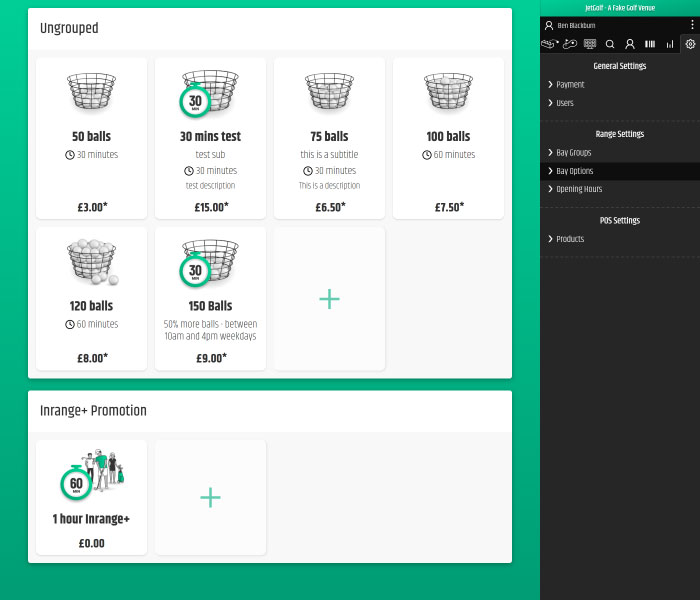
- Click the Plus '+' icon in the middle of the screen to create a new bay option.
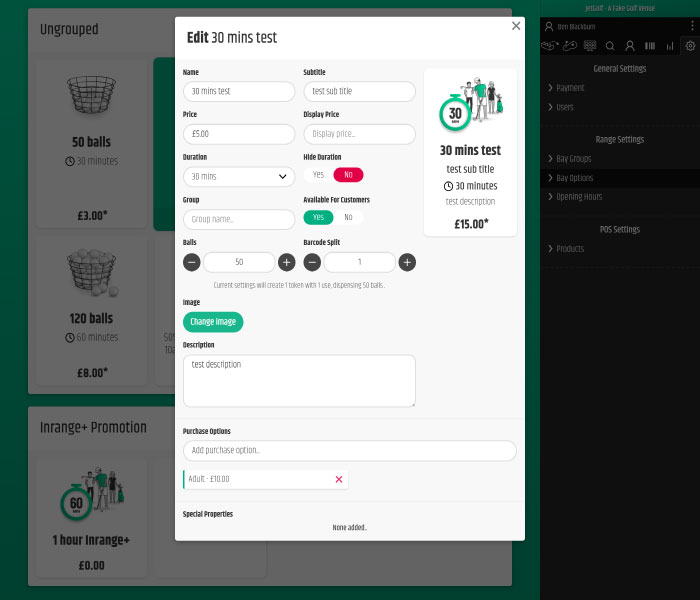
- Insert Name of bay option.
- Insert Subtitle of bay option.
- Insert Price in pence.
- Insert Display Price if you would like to show a price different to the default e.g. show a from and to price.
- Select a Duration.
- Select whether to hide the Duration Icon and time.
- Insert a Group name to group bay options together.
- Select whether the bay option is Available for customers. If No is selected then this option will only be available in the admin panel.
- Insert an amount of Balls.
- If you have a Ball dispenser integration, you can choose how many balls are dispensed when a customer scans a booking dispenser barcode by inserting a Barcode Split e.g. if you select 100 Balls and you select a Barcode Split of 2 then each barcode scan will dispense 50 balls.
- Insert the Image you would like to display.
- Insert a Description for the bay option.
- Add Purchase Options that can be selected for the bay option e.g. Adult, child, member, non-member.
- Click Create/Update.
- Under Range Settings Click Bay Groups here you will be able to assign the bay options to bays. See Bay settings